Whether you are launching your very first show or scaling an established brand, your podcast room setup is the single most important investment you will make. A great recording space delivers professional-quality audio and video that keeps listeners coming back — while a poor one drives them away before your intro music ends.
In this complete guide, we cover everything you need to know about podcast room setup — from choosing the right space and acoustic treatment to selecting the best gear and furniture. By the end, you will have a clear, actionable plan to build a studio that sounds and looks world-class.
Ready to get started? Visit Podcast ColaP to explore professional podcast production resources, or contact our team for personalised guidance.
Why Your Podcast Room Setup Matters More Than Your Microphone
Most new podcasters focus almost entirely on buying an expensive microphone, yet audio quality is determined first by the room. A Shure SM7B in a bare concrete room will sound worse than a budget USB mic recorded in a properly treated small space. Your podcast room setup is the foundation — everything else builds on top of it.
A professional studio also signals credibility. When video podcasting is involved, listeners and potential guests judge your brand within the first few seconds. Clean visuals, flattering lighting, and consistent branding all start with intentional podcast room setup ideas executed well.
Choosing the Right Space for Your Podcast Room Setup
The best podcast studio setup at home or in the office starts with selecting the ideal room. Here is what to look for:
Ideal Room Size
Smaller rooms — roughly 32 to 150 square feet — are easier to treat acoustically and give you more control over background noise. Large conference rooms with parallel walls create standing waves that make voices sound hollow, so avoid them unless you plan to invest heavily in professional acoustic treatment.
Room Shape
Irregular room shapes are your friend. Rooms with angled walls, built-in bookshelves, or non-parallel surfaces naturally diffuse sound reflections, reducing echo without any additional treatment.
Background Noise Sources
Before committing to a space, listen carefully. HVAC systems, street traffic, nearby appliances, and office chatter are the enemies of clean audio. Walk around the room at the time of day you plan to record and note any intrusive sounds.
Acoustic Treatment: The Heart of Any Great Podcast Room Setup
Acoustic treatment is about controlling sound inside your room — reducing echo, flutter echo, and low-frequency rumble. This is different from soundproofing, which prevents sound from passing through walls. For most podcast studio setups, acoustic treatment is far more important and far more cost-effective.
Budget Acoustic Treatment ($200–$500)
- Place heavy bookshelves loaded with books along rear walls
- Hang thick curtains over windows
- Lay area rugs on hard floors
- Use moving blankets on walls — inexpensive and surprisingly effective
Mid-Range Acoustic Treatment ($500–$1,500)
- Install professional acoustic panels covering at least 30% of wall surface
- Place bass traps in corners to reduce low-frequency buildup
- Add a ceiling cloud panel above your recording position
Professional Acoustic Treatment ($1,500+)
- Full room treatment with premium diffusers and absorbers
- Custom-built acoustic panels matched to your room dimensions
- Modular sound isolation booths for complete control
Pro Tip: Treat the early reflection points first — the walls directly to your left, right, and behind your microphone. This single change delivers the biggest improvement in sound quality, even on a tight budget.
Podcast Studio Setup Equipment: Everything You Need
A great podcast room setup kit does not have to cost a fortune. Here is a tiered breakdown of the essential equipment for every budget level.
Microphones
The right microphone depends on your room treatment level. Dynamic microphones like the Rode PodMic or Shure SM7B are more forgiving in untreated rooms. Condenser microphones offer superior detail but pick up more room noise, making them better suited to acoustically treated spaces.
- Entry-level ($100–$300): Rode USB Pod Mic — dual USB/XLR connectivity, future-proof for scaling
- Mid-range ($300–$700): Shure SM7B or Rode PodMic with Focusrite Scarlett 2i2 audio interface
- Professional-grade ($700+): Electro-Voice RE20 with Universal Audio Apollo Twin interface
Headphones
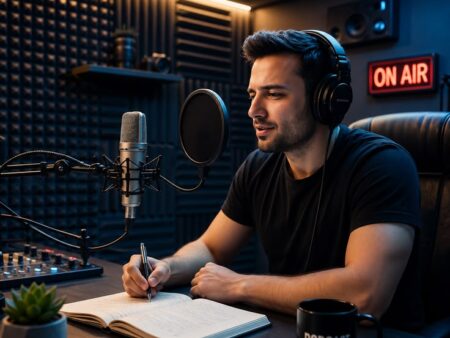
Closed-back headphones are essential for monitoring your audio without bleed into the microphone. The Sony MDR-7506 (~$110) is an industry standard used in professional studios worldwide.
Boom Arms and Shock Mounts
A quality boom arm allows you to position your microphone correctly — about 6 to 8 inches from your mouth, just below chin level — without cluttering your desk. Always pair with a shock mount to isolate the microphone from desk vibrations.
Audio Interface
If you are using an XLR microphone, you need an audio interface to convert the analogue signal to digital. The Focusrite Scarlett 2i2 is the most widely recommended entry-level option; the Universal Audio Apollo Twin offers studio-grade quality for professionals.
Pop Filter
A pop filter or foam windscreen reduces plosive sounds — the ‘p’ and ‘b’ sounds that cause distortion. At just $20–$30, this is one of the highest return-on-investment items in your podcast setup kit.
Camera and Lighting for Video Podcast Room Setup Ideas
Video podcasting is no longer optional for brands serious about audience growth. Your podcast room setup ideas for video should include a capable camera and at least a two-point lighting configuration.
Camera Options by Budget
- Entry-level: Logitech C920 webcam ($110) — plug-and-play convenience, 1080p quality
- Mid-range: Sony ZV-E10 or Sony ZV-1 ($800) — interchangeable lens, cinematic depth of field
- Professional: Sony A7 III with 35mm lens — broadcast-quality footage with full-frame sensor
Lighting Setup
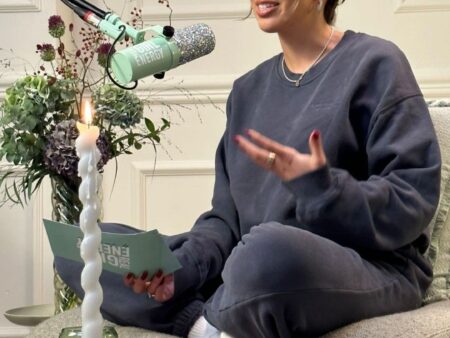
Poor lighting undermines even the best camera. A three-point lighting setup — key light, fill light, and backlight — creates depth and eliminates unflattering shadows. For home podcast studio setups, a ring light with adjustable colour temperature is a budget-friendly starting point.
- Entry-level: Ring light with adjustable colour temperature ($50–$80)
- Mid-range: Two-point soft box lighting kit ($350)
- Professional: Three-point lighting rig with RGB capabilities and diffusion panels ($500+)
Small Podcast Room Ideas: Making the Most of a Compact Space
Not everyone has access to a dedicated studio room. These small podcast room ideas prove that you do not need a large space to produce professional content.
Walk-In Closet Studios
A walk-in closet filled with hanging clothes is one of the most naturally sound-absorbent spaces in any home. The clothing acts as broadband acoustic absorbers, dramatically reducing echo. Add a small desk, ring light, and a quality microphone and you have a functional home podcast studio setup.
Corner Booth Setup
Place your desk in a corner and mount acoustic foam panels on the two walls that meet behind you. Add a ceiling cloud above and a thick rug below. This inexpensive arrangement creates a recording-ready acoustic environment in any spare room.
Portable Vocal Booths
Products like the Kaotica Eyeball or Reflexion Filter mount directly to your microphone stand and create a mini isolation environment around the capsule. These are ideal for travelling podcasters or those without a dedicated recording space.
For more small podcast room ideas and inspiration, browse the resources on the Podcast ColaP blog.
Podcast Room Setup Cost: What to Expect at Every Budget Level
One of the most common questions we receive is: how much does a podcast room setup cost? The honest answer depends on your goals, your current space, and how quickly you want to scale. Here is a realistic breakdown:
Starter Podcast Setup ($500–$1,500)
- USB microphone (e.g. Rode USB Pod Mic): $100–$200
- Closed-back headphones: $100–$150
- Boom arm and shock mount: $80–$150
- Pop filter: $20–$30
- Basic acoustic treatment (panels, rugs, curtains): $200–$500
- Ring light: $50–$80
- Total: approximately $550–$1,110
Professional Home Studio ($1,500–$5,000)
- XLR microphone (Shure SM7B or Rode PodMic): $300–$400
- Focusrite Scarlett 2i2 audio interface: $180
- Sony ZV-E10 camera: $600–$800
- Two-point softbox lighting: $350
- Mid-range acoustic treatment: $500–$1,500
- Podcast studio furniture (standing desk, ergonomic chair): $500–$1,200
- Total: approximately $2,430–$4,430
Broadcast-Grade Studio ($5,000–$20,000+)
Enterprise-level podcast studio setups include premium cameras, full acoustic room treatment, broadcast microphones, advanced lighting rigs, multi-camera switching, and custom branded furniture. These setups are designed for daily production and maximum visual impact.
Podcast Studio Furniture: Designing for Comfort and Brand
Podcast studio furniture serves two purposes: it keeps your team comfortable during long recording sessions, and it reinforces your brand identity on camera.
Desks
Adjustable standing desks ($300–$700) are ideal for podcast studios because they allow you to alternate between sitting and standing, reducing fatigue during marathon recording sessions. Look for models with built-in cable management to keep your setup clean on camera.
Chairs
Ergonomic chairs with lumbar support ($200–$500) keep guests and hosts comfortable for extended interviews. Avoid chairs with squeaky mechanisms or wheels that roll — both create distracting sounds during recording.
Branded Backdrop Systems
- Entry-level: Simple printed backdrop with company logo and brand colours ($200–$500)
- Mid-range: Modular backdrop system with adjustable lighting zones ($500–$1,500)
- Professional: LED video walls, multiple themed sets, and custom branded furniture ($1,500+)
Cable Management
Exposed cables are the enemy of a professional-looking podcast room setup. Invest in cable clips, raceways, and velcro ties to keep everything tidy. At $30–$50, cable management accessories offer an outsized visual improvement.
In-Person Podcast Setup: Recording Multiple Guests Like a Pro
An in-person podcast setup introduces additional challenges around microphone placement, camera angles, and guest comfort. Follow these best practices to ensure smooth recording sessions:
- Record separate audio tracks for each speaker to allow independent editing in post-production
- Keep a backup recorder running at all times — even a smartphone with a quality recording app works
- Use visual cues to help guests maintain correct microphone distance
- Position cameras at eye level or slightly above for flattering angles
- Brief every guest on mic technique before recording begins
For guidance on being a memorable guest on any show, read our article on how to be an unforgettable podcast guest — preparation and communication are as important as your technical setup.
The Ultimate Podcast Setup Kit: Your Checklist Before You Record
Before every recording session, run through this podcast setup kit checklist to prevent technical issues:
Audio Checks
- Test microphone gain levels — aim for peaks around -12 dB with headroom to spare
- Listen through headphones for background noise, hum, or interference
- Confirm all guests have working headphones and can hear clearly
- Check that recording software is capturing separate tracks per speaker
Video Checks
- Confirm camera focus and exposure before hitting record
- Check that your backdrop is centred and well lit
- Remove any objects in the frame that distract from your branding
- Test screen share or presentation software if slides are involved
Comfort and Logistics
- Ensure water is accessible for all speakers (glass, not plastic — bottles crinkle)
- Set room temperature to approximately 72°F / 22°C
- Share talking points or episode outline with guests 24 hours in advance
- Schedule a 10-minute tech check before the official start time
Podcast Studio Setup Near Me: Renting vs. Building Your Own
If you are searching for a podcast studio setup near me, you have two main options: renting an existing professional studio or building your own. Each approach has distinct advantages depending on your recording frequency and budget.
Renting a Professional Studio
Renting a fully equipped studio is ideal for occasional recordings, pilot episodes, or high-stakes interviews. Most cities now have dedicated podcast studios available by the hour ($50–$200/hour), with professional lighting, acoustics, and equipment already in place.
Building Your Own Studio
If you record weekly or more frequently, the economics shift in favour of building your own podcast room setup. After an initial investment of $1,500–$5,000, your marginal cost per episode drops to near zero — and you gain total control over your environment and branding.
Have questions about which approach is right for your situation? Contact the Podcast ColaP team for expert advice tailored to your goals.
Final Thoughts: Build a Podcast Room Setup That Grows With You
The best podcast room setup is not necessarily the most expensive one — it is the one that fits your current goals, sounds great, and positions your brand for growth. Start with proper acoustic treatment, invest in a quality microphone matched to your room, and layer in better cameras and lighting as your show scales.
Remember: your studio is a physical extension of your brand. Every design decision — from your backdrop colours to your furniture — communicates something to your audience before a single word is spoken.
Ready to take the next step? Visit Podcast ColaP to discover professional podcast production support, or get in touch with our team to discuss your studio build today.